|
Creating a Database Using Access
Databases are a method to organize lists of data. Access is a powerful
database that allows organization of data into tables and then for relationships
to be made between the tables. Access is a relational database.
- Open Microsoft Access and click the Blank Database option then OK.
This will bring up the File New Database Window.
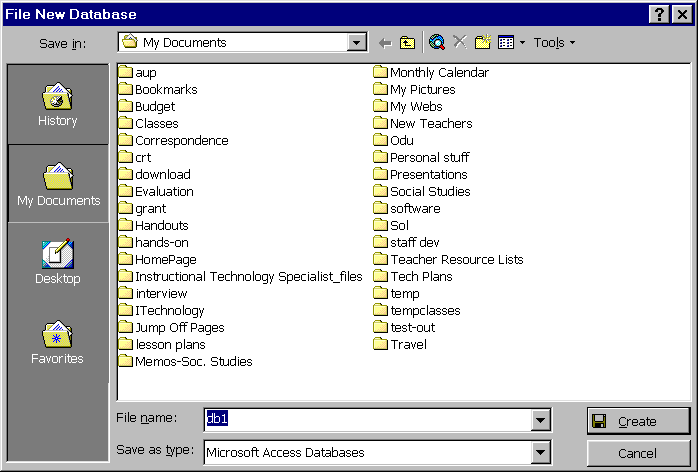
- You must name and save the database before you start creating it.
Type a name for your database in the File name box. Next, click
create.
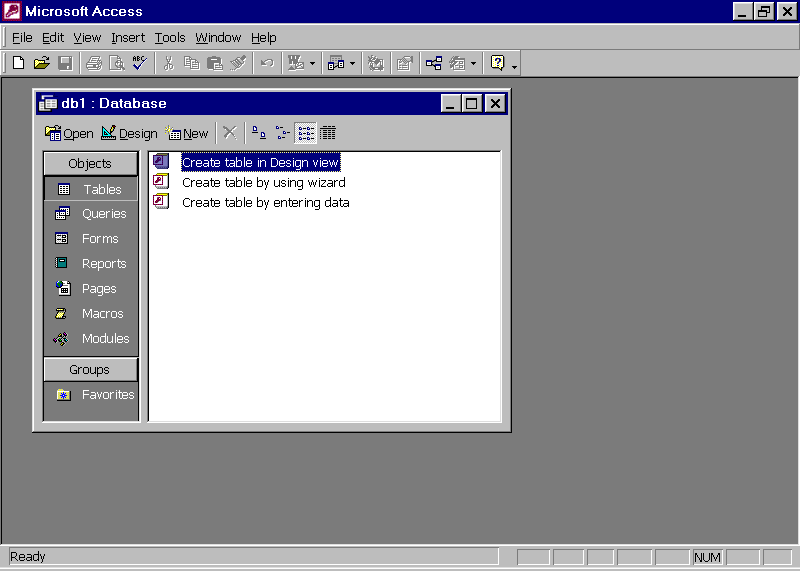
- In the next window (shown below), you will see tabs with a variety of
options. It is usually a good idea to start with a table.
Creating a Table
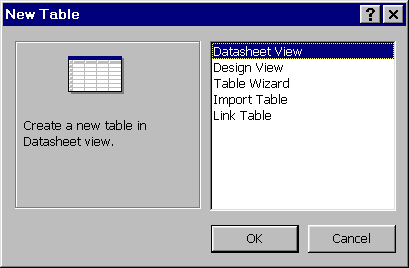
- In the Database Window, Table is already selected. Click on New to
begin
- In the New Table box, it is best to select Design View to allow you to
design to meet your specific needs. Click OK.
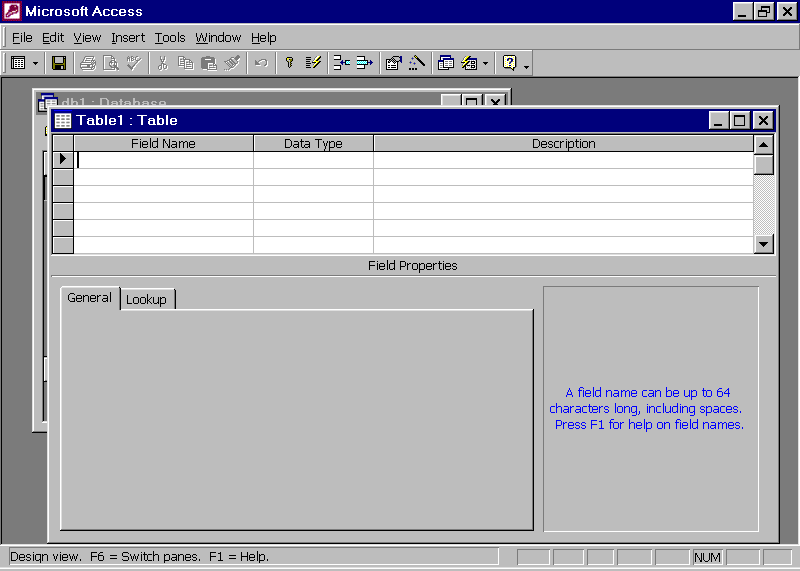
- Start creating your fields. Be sure to select the appropriate data
type by clicking the down arrow in the Data Type column and making a
selection.

- It is not necessary to type a description for each field, but it is
usually a good idea to do so.
- When you have finished creating the fields, click on the View Button (top
left corner) to go to the datasheet view to enter your data.
- Access will tell you that you need to save the table first. Click on
yes.
- Next, you will be asked if you wish to create a primary key. In most
cases, however, it is best to say No.
- Start entering your data in datasheet view. Use the tab key to move
to each field.
Entering Data Using a Form
- After you have designed a table, you can easily swith to Form View and
enter data into a form. In some cases, this makes data easier to
enter. Begin by clicking on the New Object button and select AutoForm.
- Enter the infomration for each field by pressing Tab after each
entry. When you have completed a record, press Tab or Enter to move to
a new record. You could also use the buttons on the bottom left of the
screen to move easily through the different fields.
| Entering data is easier in this view |
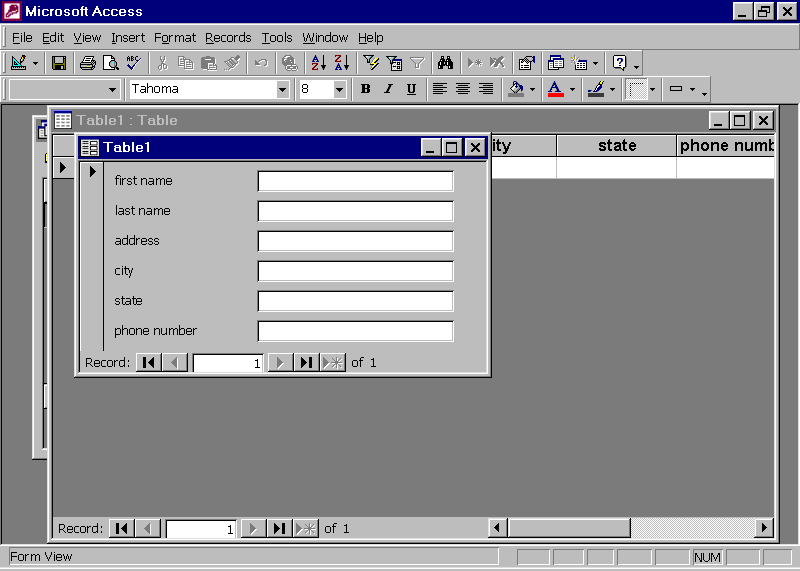 |
| Navigation located at the bottom of the form |
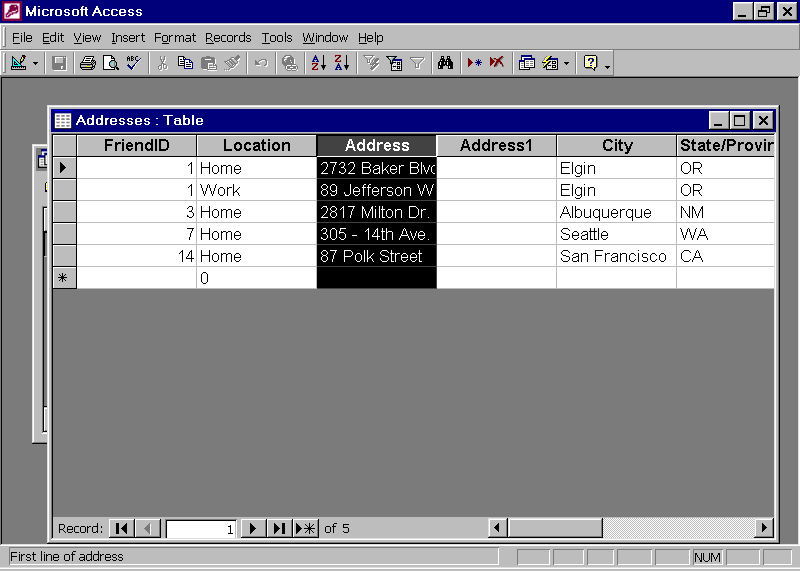
- You can click on the View button to go back to Datasheet View. When
you do so, the table appears with the information that you entered.
You can very easily toggle back to Form View and continue entering data.
- You can exit the form by clicking the Close button in the form
window. You do not need to worry about saving the form, because each
record was saved as you entered it.
- Afterwards, the table that you started is now visible. You will not
see the records that you added in Form View. You will have to update
your table.
- Click on Records and choose the Remove Filter/Sort command. This
will display all your records.
Sorting Records
- In Datasheet View, decide which field you would like to sort. Click
on the column heading to select the field.
- Next, select on the Sort Ascending or Sort Descending button.

Filtering Records
You can use a filter to display specific records that you would like to
see. Two ways to apply are the Filter by Selection and the Filter by Form.
Filter by Selection
- Choose a field (column) and select the criteria for your filter (see
below).
- Next, click the Filter by Selection button.
| Filter by Selection |
 |
Apply/Remove Filter |
|
Filter by Form |
|
Depending on what is selected, only the records that have that selected field
will appear.
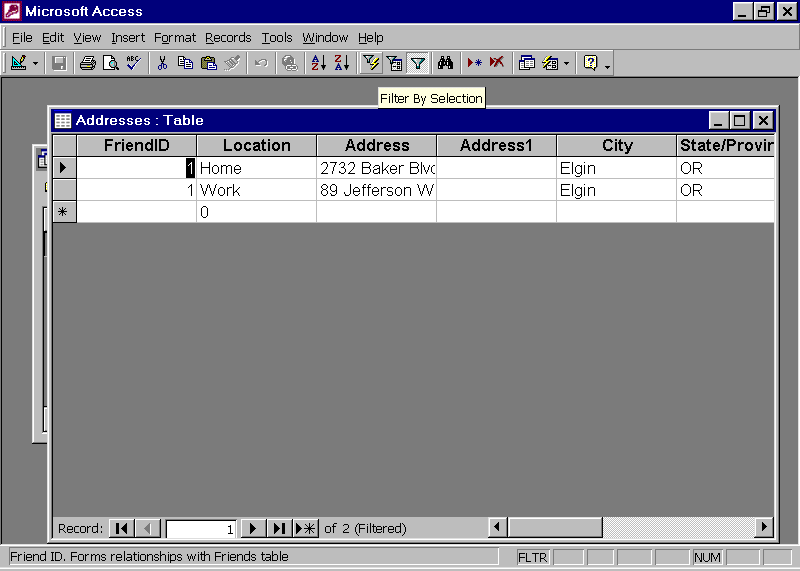
To show all records, click on the Apply/Remove Filter button.
Filter by Form
This lets you set up a filter with more than one criteria.
- Click on the Filter by Form button. You will see the field names
(column headings). You can click inside any of these columns and a
down arrow will appear.
- Click on the down arrow and choose your criteria.
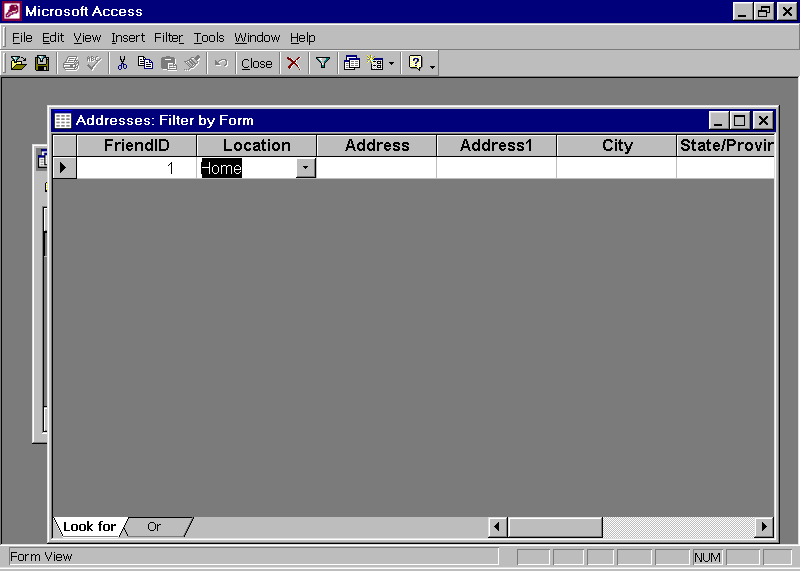
In the above example, Home was selected. This will show all the records
that listed home in the Location field. You can click in any other columns
and set other specifications.
Using a Query
In Access, you can use a Query to pull complete or partial records from you
database. Using a query, you can specify the type of infomration that you
want.
- Click the down arrow next to the New Object button. Choose Query
from the menu that appears.
- In the New Query dialog box, select Design View and click OK. This
will allow you to design a query to meet your needs.
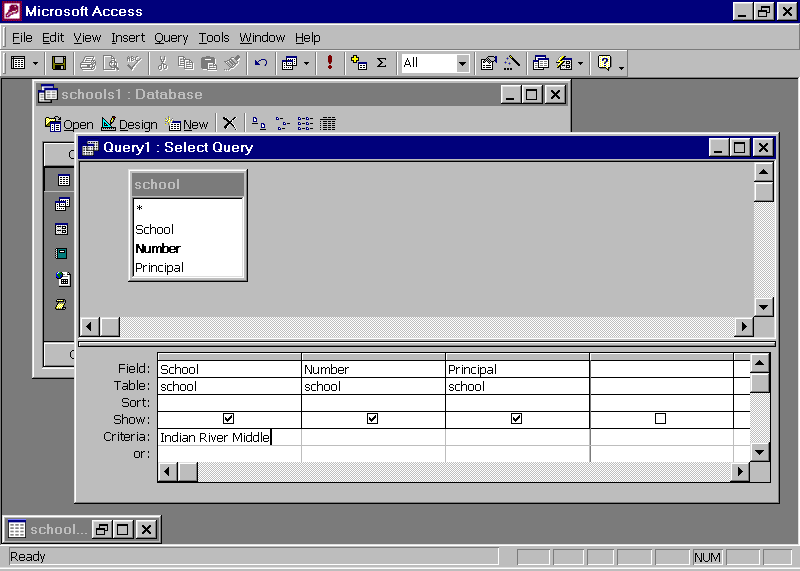
- You can decide which field you want to include in your query by clicking
inside a column and using the down arrow to select the field that you want
to show. In the above example only the school name, school number, and
principal will show for the records when the query is applied.
- When you have established your criteria, click on the Run button to apply
the query.

Creating
Reports
Using
Access, you can create a report on your data very easily. You can print a
report on a table or query. It is a good idea to use AutoReport or the
Report Wizard.
AutoReport
Click
on the down arrow next to the New Objects button and choose AutoReport.
This will create a very simple report for you using the data displayed.

Report
Wizard
- Click
on the down arrow next to the New Object button and choose Report.
- Choose
Report Wizard. Make sure that the name of the table or query that you
want to create a report from is in the box where you see "school"
in this example. If it is not there, click the down arrow and select
it.
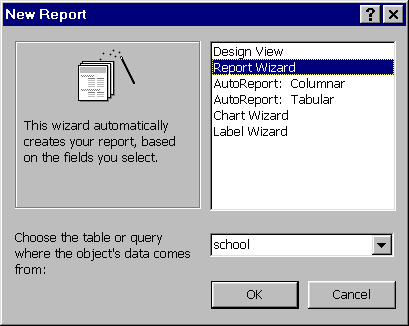
- Click OK and a series of windows will come up allowing you to make
decisions about your report. When you are ready to see your report,
click Finish.

Return to Database
Handouts
|
 Fly
Fly